Best Android Themes That Are on Another Level

If you want to make your smartphone look beautiful, cool, and unique, then you are in the right place. There are a lot of craziest Android themes for your smartphone. These setups will take your smartphone screen to the next level.

Ubuntu Shamrock Theme

This theme is for Linux fans. The theme replicates Linux Ubuntu OS. You will get icons on the side panel. You will get the same orange and purple color scheme. Users can get a fake terminal that provides information about their smartphones. The info is not pretty accurate, but some of it is displayed correctly.

Users will also get a music window. You can also customize the setup by using the setting icon. It will open a new window. You will get a drop-down menu with current notifications by tapping on the date. It will also show upcoming calendar events.

You can see more information by tapping on the clock option. It includes volume, brightness, wi-fi, and other information. However, you cannot change these settings from this menu. Users will get an option to go to KLGT settings. You can get recent menus by tapping activities.

You can use this theme on any smartphone by importing the theme via the KLGT app.

Windows 11 Theme

This theme is almost identical to Windows 11. The theme has the same wallpaper, style, taskbar, options, widgets, and icons. It is fully functional and works. Within the taskbar start menu, you can launch any of those pinned applications. However, you will have to remap them within KLWP settings.

If you tap on the arrow up option within the taskbar, it will open a widget panel. The widget panel is similar to the Windows 11 widget. It is not as powerful as Windows 11, but it is working properly. It also shows the weather forecasts in your area. The calendar widget lets you manage your upcoming or past events.

Users can easily change the style similar to Windows 11. You can choose a darker background for the menus and taskbar. You can also switch between a transparent or opaque look as well as new Windows 11 wallpapers. The theme also includes KWGT widgets that are inspired by Windows.

To use this theme, you will need Nova launcher installed and set it as your default launcher. After that, download the KLWP live wallpaper maker application and KLWP pro key. After that, you will need to download the Windows 11 theme for KLWP. It will cost you about $5 to $8.

Launch the Nova launcher on your device and remove everything from your home screen. Change the wallpaper to the live wallpaper named Kustom. Click on the gear icon and select the load preset option. You will get Windows 11 in the installed pack within explorer. Setup the different sections of Shortcuts, Globals, Position, and then tap on the save icon.

Neumorphic Shadow Theme

The theme has a cool neomorphic effect, and it seems like widgets are popping out at your screen. The home screen consists of a single widget. You can download the icon pack named Shadow KWGT. It has a thick blue bar for the battery. You can also toggle Wi-Fi, Bluetooth, Google assistant from the side notification panel.

Users can also add a music player and calendar for another window. The calendar widget is along with two search bars. Users can remove it from the KWGT widget setting. You can also use custom wallpaper as your background wallpaper. You will need enough black space to edit your widgets.

Android 12 Theme

Android 12 has cool and new animations, widgets, themes, and a lot of design changes. However, you can create your own custom setup for Android 12 with some widgets. You will need a KWGT Kustom widget-maker, which is free, and a KWGT Kustom widget pro key ($5.99).

Uzuri KWGT app contains a new Android 12 status bar, search bar, calendar, step counter, and other widgets. It will cost you $0.99. However, you will have to customize the colors to better match the theme. You can download the Android 12 widgets app for free. For music controls, you will need the KGGM material app.

Edit and customize your widget according to the Android 12 theme.

Conclusion

These are the cool and craziest Android themes that will blow users’ minds. You can customize these themes according to you. You will need the KLGT application and pro key. These themes will cost you about $10, but you can use any of the theme themes for a lifetime period. You will even get the option to create your own unique theme via the purchased application.

Source: Best Android Themes That Are on Another Level

An Error Occurred ‘try again’ Playback ID on YouTube: Here are the Fixes

Numerous users are getting “An error occurred. Please try again later. Playback ID” on their YouTube while trying to play a random video. It is a very annoying error which spoils the watching video experience. If you face the same issue and struggle to find the solutions, here are some quick instructions to solve the error.

System Restore

To system restore, pursue these on-screen step by step instructions provided below:

  1. To invoke the Run accessory, use the Win and R shortcut keys over the keyboard.
  2. Then input “rstrui” into it and press the Next button.
  3. Once launched the System Restore screen, hit the Next button.
  4. Jump to the next window, begin by ticking the related box with the ‘Show more restore points’ option.
  5. Afterward, choose the system restore point dated before you first began with this specific error.
  6. Later, hit the Next button to advance.
  7. You should click on the Finish button and then hit the Yes button on the verification pop-up to begin the restoring procedure.
  8. The system will reboot, and the previous state will be enforced on the next startup.

Switch Accounts

To switch accounts, pursue these on-screen step by step instructions provided below:

  1. Go to your favorite web browser and open it on the system.
  2. Then, reach the new tab and select the Account option over the screen’s right-hand side that adds the first initial of the username.
  3. You should select the ‘Add Another Account’ option and pursue the pop-up to add different accounts to the browser.
  4. Once added to the account, launch YouTube with a similar account and check the issue.
  5. If it continues, switch the toggle of ‘Autoplay’ to disable it and then turn it back on.

Turn off and on Autoplay

To turn on and off Autoplay, pursue these on-screen step by step instructions provided below:

  1. Navigate to YouTube and launch your video you would like to.
  2. After launching the video, in case the autoplay is turned on, disable it.
  3. Then refresh the page and redo the same thing again, then reboot the Chrome browser.
  4. Now, check the issue.

Turn off Extensions

To turn off extensions, pursue these on-screen step by step instructions provided below:

  1. Go to Chrome and launch it on your device.
  2. Then select the vertical ellipsis menu icon at the upper right side of the screen.
  3. Once launched the menu, select the ‘More Tools’ option and click on the ‘Extensions’ option via the list.
  4. You should switch the toggle to each unwanted extension to disable it.
  5. Later, check whether the problem continues once disabled these extensions.
  6. Finally, in case you would like to proceed using the ‘AdBlock,’ add the pursuing line to the exception rules to let both Reddit and YouTube: http://www.reddit.com https://www.youtube.com/get_video_info xmlhttprequest allow

Flush DNS Cache

To flush DNS cache, pursue these on-screen step by step instructions provided below:

  1. To invoke the Run accessory, use the Win and R shortcut keys over the keyboard.
  2. Then insert ‘cmd’ into it and press the Enter button.
  3. Once you see the UAC pop-up, press the Yes button.
  4. After that, input the pursuing command and hit the Enter key to flush the DNS cache: ipconfig/flushdns

Once you get the verification message, launch a YouTube video earlier showing the “An error occurred. Please try again later. Playback ID” error and then check the issue.

SOURCE: An Error Occurred ‘try again’ Playback ID on YouTube: Here are the Fixes

Here’s How You Can Get the Android 11 Update on Your Chromebook

Chromebooks are the perfect and budget-friendly alternatives to traditional Windows and Mac computers. In fact, Chromebook computers are different from Mac and Windows in a lot of ways. These computers are quite popular among kids and students, and they are also easy to use for anyone. Chromebook computers run on the Google operating system Chrome OS, and that means you can’t use the Windows or macOS programs on these devices. But, on the other hand, Chromebooks have the advantage of including support for Android applications. In a lot of ways, Google’s Chrome OS device is like a desktop version of Android. It looks like Android, it runs like Android, and it even runs Android apps. Launched in the year 2011, Chromebooks have now become a much faster and advanced device. They are lightweight and mainly focused on web browsing.

For about two years, Google hasn’t updated the Android version for Chromebooks. But now, finally, a new Android version update has started to roll out for the users that change the Android version 9 to the latest version 11. Along with this, the approach for running Android apps on Chrome OS devices has also changed. Instead of the ARC++, this new Android version uses a VM approach, also known as ARCVM. This new version includes some great computing features and will provide you with a great computing experience. Do you want to try Android 11 on your Chrome OS device? Don’t know how you can get the update? If yes, then reading this entire post will teach you how to get the Android 11 update on your Chromebook computer.

Procedure to Get the Android 11 Update on Chromebook

Any Chromebook user can quickly get the Android 11 update on their device. For this, you must follow the procedure that is mentioned here. And before starting with the method, you need to check whether your Chromebook is eligible to get the update. The Chromebook models on which the Android version can be updated include IdeaPad Flex 5i Chromebook, HP Pro c640 Chromebook, ASUS Chromebook Flip C436FA, Samsung Galaxy Chromebook 2, and Acer Chromebook 11 C670. You can get through the entire list on our other guide. Now, to get the update, please take a look at the below-mentioned procedure.

Steps to Get the Android 11 Update on a Chromebook

Here are the steps through which one can update the Android version on their Chromebook device:

  • Start the procedure by opening the Quick Settings panel on your Chromebook device. You will find the option for this on the bottom right corner of your device’s screen.
  • Now, from the options list, click on “Settings.”
  • And once the Settings page opens up on your screen, you need to navigate to the “About Chrome OS” tab that you will find on the left pane.
  • After this, navigate to the right side pane and then select the option of “Additional Details.”
  • Next, you will have to change the channel to “Beta” by clicking on the “Change Channel” button.
  • And then, get back to the “About Chrome OS” page and click the “Check for Updates” button. Your device will now start developing the latest Chrome OS beta build,
  • After installing the update, restart your Chromebook device. And once your Chrome is restarted, navigate to the Settings page again and go to the “Apps” section. Here, you will need to click on the option of “Manage Android Preferences.”
  • At last, to make sure that the update is installed, you need to go to the “System“ section and then click on “About Devices” to check the update. And that’s it.

So, this way, any Chromebook user can get the Android 11 update on their device. Try the technique, and if you liked this post, then please stay connected to us to get more updates like this.

SOURCE:Here’s How You Can Get the Android 11 Update on Your Chromebook

How to Turn Off All Notifications in Windows 11

Microsoft Windows users around the globe are now anxiously waiting for the arrival of all-new Windows 11. The company introduced this updated version of Windows back in June, and according to the information, it is set to roll out for all the users on October 5, 2021.

For now, Windows 11 is available on Windows Insiders. Microsoft’s new Windows 11 is undoubtedly the major upgrade to the Windows operating system, and it includes some great features that will maximize the experience of the users even more.

This upgraded version of Microsoft Windows will be free for all Windows 10 users. Windows 11 comes with an entirely resigned layout that includes a new Start Menu, an updated Start button that you will now find at the center of the taskbar. And along with this, it will also bring several improvements to system performance.

Windows 11 comes with a new way to present desktop and app notifications. And this can be pretty handy for the users as this way they can keep track of all the significant changes happening in the system. However, sometimes, it can be pretty frustrating to receive continuous notifications, and you might want to turn them off for a while.

Do you know how to turn off all the notifications in Windows 11? Are you also one of the Windows users? If you want to see how one can disable notifications in Windows 11, you will have to go through this entire post.

The following article will provide you with the methods that you can use to perform this task. So, continue reading the blog to get the techniques to turn off notifications in Windows 11.

Methods for Turning Off Notifications in Windows 11

Let’s face it, it happens with all of us when we are working on some critical project on our computer, and the notifications start popping up on the screen. This can distract you entirely from your work. But with Windows 11, you can handle this situation with much ease.

There are multiple ways through which you can turn off all the notifications in Windows 11. You can do so using the Settings app, or you can do so from the Notification Center on your computer.

Here, we have mentioned two different methods for performing this task. Each technique includes some simple instructions to follow. So, let’s move on to the first way to turn off the notifications in Windows 11.

Method 1: Turning Off all the Notifications in Windows 11 Using the Settings App

Here is the first method following which you can disable notifications in Windows 11. Follow the instructions given here:

  • First, launch the Settings page on your Windows 11 computer. You can do so by clicking on the Start menu button on the taskbar. And then click on the “Settings” icon.
  • And once you reach the Settings screen, go to the “System” tab on the left sidebar and click on it.
  • After this, you will get to the System Settings page. Here, you will have to locate and click on the “Notifications” tile that you will see on the right-side section.
  • And now, you will be able to see all the notifications-related settings on your computer screen.
  • Simply turn off the toggle button located next to the “Notifications” option to disable all the notifications at once.
  • And that’s it. You have successfully turned off the notifications on your Windows 11 computer.

Method 2: Disable the Notifications in Windows 11 from the Notification Center

You can also turn off all the notifications on your Windows 11 computer from the Notification Center. Here’s how this method works:

In Windows 11, the Action Center is no longer the home for the notifications. You can now access it from the date and time system tray icon instead.

  • To get started, first of all, launch the Notification Center and then click on the three horizontal dotted lines.
  • Now, you will see some options appearing on your screen. From the list of the options, you will have to click on “Turn off All Notifications for <app>.”
  • After this, you will stop getting notifications from that particular application. And this way, you can turn off the notifications for all other apps also.

The Steps to Set the Notification Priority in Windows 11

Windows 11 also enables you to set the notification priority. You can do so if you don’t want to miss any important notifications. Here’s how one can set the notification priority on Windows 11:

  • Firstly, go to the Notification Center and click on the three-dotted menu icon of the notification.
  • From the options appearing on your screen, click on “Make <app> High Priority.”
  • On the App’s notification page, you will have to set the priority for notifications.
  • You can prioritize the application to the top, high, and normal, based on your preferences. And that’s all.

So, these are the methods that you can apply to turn off the notifications on a Windows 11 computer. If you want to know more about Windows 11, you can read the related posts by jumping to our official website.

Source:How to Turn Off All Notifications in Windows 11

Enable Safari Private Browsing Mode in iOS 15 on Your iPhone

Are you an Apple device user, or are you planning to get an iPhone or iPad? Apple is a big brand that is well-known for designing smartphones, computers, and laptops. All Apple devices come with multiple great features that work to provide the best experience to their users.

And among all other gadgets, iPhones and iPads have always been the most preferred and popular Apple devices. iPhones and iPads are commonly used Apple products all around the world.

Whether it’s an iPhone, iPad, or Mac, all the devices this company produces come with some pre-installed programs, and Safari is one of them. Safari is the default browser on iPhone, iPad, and macOS, and the company first released it in 2003. Using this browser is also easy for any Apple device user.

Apple has recently announced the arrival of the iPhone 13. And with this, the company is also set to release the latest version of its operating system, iOS 15. This upgraded version of iOS includes various excellent features that will boost the experience of iPhone and iPad users.

For instance, notifications have been redesigned in iOS 15, which means the users can now add contact photos for people and even increase the app icons’ size. Along with this, Safari in iOS 15 also looks completely different because of the revamped design and user interface. The way to open a private tab in Safari is now different.

In iOS 14, the users had to tap on the tabs button and then choose the option of “Private” to enter the private browsing mode. But in iOS 15, you might face issues finding this option.

Now you must be wondering how you can browse privately in Safari in iOS 15. If you want the answer to this question, you will have to read this entire post. The following article will let you know how to enable the Safari private browsing mode in iOS 15 on your iPhone.

Enabling Safari Private Browsing Mode in iOS 15

Because of the significant design change, some of the options in the Safari browser are placed differently, but their functionality remains the same. And enabling the private browsing mode is still simple for anyone.

There are multiple methods through which any iPhone user can turn on the private browsing mode in Safari in iOS 15 with much ease.

 Here, we have mentioned two simple techniques that include some instructions to follow. So, let’s get started with discussing the first method now:

Method 1: Enabling the Safari Private Browsing Mode in iOS 15 Using the Long-Press Shortcut

It is the first technique that you can follow to turn on private browsing mode in Safari in iOS 15. Go through the steps mentioned here:

  • First of all, unlock your iPhone, and then you will have to launch the Safari browser.
  • After launching the browser, navigate to the bottom right corner of the screen and long-press the tabs icon. Now, a menu will pop up on your device screen, and here, you will have to choose the option of “Private/New Private Tab.”
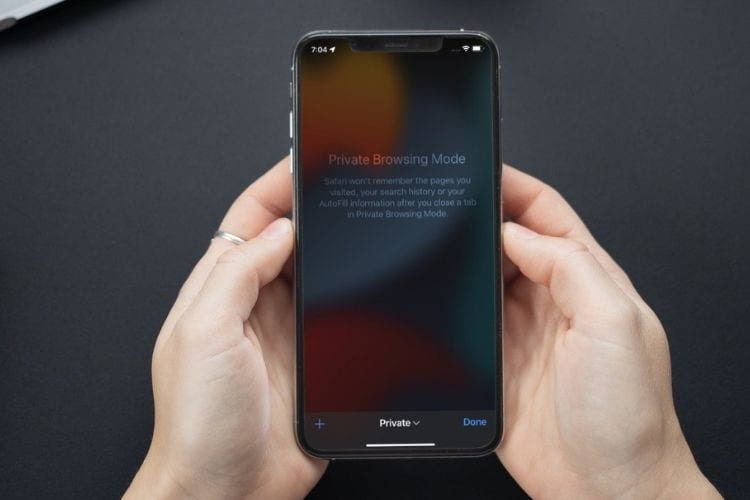
  • The address bar on the browser page will now turn dark, and you will see the message “Private Browsing Mode is Enabled” appearing on your screen.
  • And that’s it. You can now browse the web knowing that Safari will not save your browsing history.

If you wish to disable the private browsing mode at any time, you can do so by long-pressing the tabs icon. And then, tap on the “X” tabs from your custom Safari tab group.

Alternative Method to Open a Private Browsing Window in Safari on iOS 15

You can also turn on the private browsing mode in the Safari browser in iOS 15 from the tab menu. Here are the instructions that you will need to follow:

  • Start by launching the Safari browser on your iPhone running iOS 15, and then go to the bottom right corner of the screen and tap on the tabs icon.
  • Next, you will have to tap on the “X Tabs” option that you will see located at the bottom center of the screen. Proceed further by tapping on the “Private” option.
  • Now, tap on the “+” icon that you will see located on the bottom left corner of the screen, after which a new private Safari tab will open up on your iOS device screen. You can now start browsing anonymously.

So, these were the two simple methods through which any iPhone user can enable the private browsing mode in the Safari browser in iOS 15. And that’s all for now. Thanks for reading this entire post. And If you wish to know more about iOS 15, please check out the related articles by visiting our official website right away.

SOURCE:Enable Safari Private Browsing Mode in iOS 15 on Your iPhone

PUBG New State: Release Date and Info

There is a new PUBG game coming to mobile called PUBG: New State. It is coming to Android and iOS later this year. It will offer an exclusive map. PUBG New State contains ultra-realistic graphics, and it is optimized for mobile

Krafton is slowly releasing info for PUBG: New State. They have released a trailer that announces a closed alpha test will take place in the US. It is for Android devices. It will take place in the next couple of days.

PUBG Original

PUBG revolutionized the battle royale genre worldwide. It is humbling to be able to introduce the next game in the franchise. PUBG: NEW STATE wanted to build on the legacy by creating an experience that pushes the limits of mobile gaming.

PUBG is one of the best-selling video games of all time; since its launch in 2017, PUBG has accomplished several accomplishments. It includes seven Guinness World Records and Many Game of the Year Awards.

PUBG: New State

It is basically PUBG, but with slightly improved graphics. It looks like any other battle royale game. There is not much info available yet. PUBG: New State will take place in the future, which means it has set in 2051. The game is being designed to push the limits of a mobile release. It will utilize a new tech, Global Illumination. You will get better and improved graphics. It has a new weapon customization feature. It will allow players to transform weapons.

What’s New?

New State will offer a new map for the series. The global release will not include India, China, or Vietnam. Regardless, both games will exist, the player base will be split. It seems like an odd path to go down. PUBG: New State is available for pre-registration on the Play Store.

New Stateadds many new features. It also has a new in-game weapon customization feature. Each player can make various weapons by obtaining kits. These customization kits will transform weapons in several ways. For example, performance enhancements, fire mode, grenade attachments. This new game contains combat rolls, drones, and a shield. Players will also be able to explore 8×8 open worlds maps with new vehicles.

Expectations

PUBG: NEW STATE will deliver the full battle royale experience directly into players’ hands. Players can expect the same experience that is easy to learn and master. It has a new rendering technology called Global Illumination. It is realistic and intense, but more importantly, smooth and stable.

Release Date

KRAFTON unveiled PUBG: NEW STATE, the newest battle royale, on FEBRUARY 25, 2021. The game is developed by PUBG Studio. They are the creators of PUBG. The title will launch on Android and iOS in 2021. Players can get the latest information on the game by pre-registering today on Google Play Store. It will later be announced for App Stores.

Players can explore various interactable objects. It will help players’ to come up with new ways and strategies.

A few days ago, Krafton released a video stating that alpha testing for PUBG: New State would begin in the US soon.

You can sign up on the official PUBG: New State official website. You can also sign up simply by pre-registering on the Play Store. This application period will end on June 6. After that, the alpha is expected to run from June 11th.

Krafton is looking to receive feedback from players. It will be used to ensure the game is released in an acceptable condition. Nobody knows the official release date.

HIGHLIGHTS

  • PUBG New State pre-registrations for Android are on air, and the iOS platform to begin soon.
  • The new game is expected to launch later this year.
  • PUBG New State closed alpha testing will be available in the US for Android only.

How To Download?

  • Visit PUBG New State’s website for the Alpha Test.
  •  Click on the ‘ Apply for Alpha Test’ button.
  • Read and accept the terms of service as well as the privacy policy.
  • Press next.
  • You will be prompted to log in to their Google account.
  • Players must answer the application survey.
  • Press submit to complete the application for the Alpha Test.
  • Results will be out on June 9th

Conclusion

The players will be notified about selection on June 9th, 2021. You are able to check applications by logging in. You will have to use the same Google Account. Selected players can visit the Alpha Test participation page. It will provide you further instructions regarding the download process.

Source:PUBG New State: Release Date and Info

How to Fix Overwatch Black Screen Issues?

Overwatch is one of the best team-based multiplayer first-person shooter video games by Blizzard Entertainment. It is compatible with all leading platforms like PS4, Xbox One, and Windows. Characterized as a “hero shooter,” Overwatch assigns players into two teams of six. Every player picks from a roster of 29 characters, known as “heroes, ” every with a unique play style, whose roles are divided into three categories that suit their role. Nevertheless, we have recently got many gamers’ reports encountering a black screen issue when trying to run their game. The game neither crashes nor plays, and gamers are stuck with a black screen.

Lower the Graphics Settings

To lower the graphics settings, pursue these on-screen instructions provided below:

  1. Go to the primary menu of Overwatch.
  2. From the slider or pull-down and adjust the quality of graphics to Low.
  3. After that, click on the Options button.
  4. You should lower the information and resolution.
  5. Check all the earlier instructions whether you observe an in-game improvement performance.
  6. Now, turn off the ones that decreased the performance.

Modify the Settings of Game

To modify the settings of the game, pursue these on-screen instructions provided below:

  1. Launch the ‘GeForce Experience’ application.
  2. Thereafter, choose and hit the Games button.
  3. Through the left panel and click on the Overwatch option.
  4. Go to the right-hand side panel and click on the ‘Custom Settings’ button.
  5. Reach the Display Mode section and click on the ‘Borderless Window’ option.
  6. Later, hit the Apply button.
  7. Make sure the screen performs at his right response rate.

Scan and Fix Game Files

To scan and fix game files, pursue these on-screen instructions provided below:

  1. Firstly, launch the application of ‘BlizzardClient.’
  2. Thereafter, click on the Games option.
  3. You should reach the right panel and pick Overwatch.
  4. Then select the Options button at the upper left-hand side of the screen.
  5. Select the ‘Scan and Repair’ option through the appropriate options.
  6. After that, hit the tab of Big Scan.
  7. You have to wait to complete the scanning procedure.
  8. Now, run the game and confirm whether the error is continuing.

Remove Game Cache

To remove the game cache, pursue these on-screen instructions provided below:

  1. Hold the ‘Ctrl + Shift + Esc’ hotkeys combination over the keyboard to invoke the Task Manager.
  2. Then select the More Details option.
  3. After that, click on the tab of Processes.
  4. You should confirm the existence of Blizzard Update Client or agent.exe.
  5. Choose one of both available options if applicable.
  6. Now, hold the button of End Process through the lower side of the app.
  7. Thereafter, invoke the Run accessory by holding the Win and R hotkeys combination over the keyboard.
  8. Once it opens, input ‘%Programdata%’ into it and hit the Enter button.
  9. Now, browse inside the directory for the ‘Blizzard Entertainment’ folder.
  10. You should remove the folder of Blizzard Entertainment.
  11. Then reboot the Blizzard client.
  12. Finally, run the game and confirm whether the problem continues.

Turn off the Game DVR

To turn off the game DVR, pursue these on-screen instructions provided below:

  1. Launch the Windows menu and select the Settings option.
  2. You should choose the Gaming option.
  3. Pick the option of Game Bar situated inside the sidebar.
  4. Then turn off each option through the Game Bar.
  5. Go to the Game DVR and click on it.
  6. Then disable each option through the Game DVR.
  7. You have to select the True Play option.
  8. After that, disable the True Play.
  9. Launch the game and check whether the solution works

SOURCE:How to Fix Overwatch Black Screen Issues?

Fix: Netflix Not Loading on Sony Smart TV

You suddenly get a blank screen whenever you try to launch the Netflix app on your Sony smart TV. Numerous users are reporting about this and asking for solutions. If you deal with the same issue with your Netflix app, you can follow the mentioned instructions because there are several reasons behind this issue, such as removing cache, reset and reinstalling the app, etc. So, if you want to fix this issue, read this article carefully.

General Troubleshooting

If you would like to do general troubleshooting, then you can pursue the whole procedure mentioned below:

  1. First of all, check whether the internet connection is functioning correctly.
  2. In case you are linked to a wireless connection, attempt to reboot the router.
  3. After that, keep in mind that the Sony Smart TV has installed the newest firmware update.
  4. You should check whether any other applications, preferably streaming services, are functioning well.
  5. Now, update the Netflix application. Additionally, you should also attempt to reload Netflix.

Connect & Reconnect the Power Plug

If you would like to connect and reconnect the power plug, then you can pursue the whole procedure mentioned below:

  1. First and foremost, switch off the Sony smart TV.
  2. After that, detach the power plug, and you should wait for a minimum of 30 seconds.
  3. Connect the power plug cord back to the wall outlet and switch on the Sony smart TV.

Disconnect Modem or Router for a While

Firstly, switch on the Sony smart TV, detach the router or modem, and wait 60 seconds. After that, connect it back to the modem or router, wait for the Wi-Fi network to get linked to the Sony smart TV, and check with the Netflix application after connecting.

Update the System Software

If you would like to update the system software, then you can pursue the whole procedure mentioned below:

  1. First and foremost, select the Home button on the remote.
  2. After that, reach the Settings option and hit the OK button.
  3. You should move down by utilizing down arrows and choose about, then press the OK button.
  4. Finally, click on the System Software update and click on the OK button.

Fix Netflix (-111) Error

If you would like to fix Netflix (-111) Error, then you can pursue the whole procedure mentioned below:

  1. Once you receive this annoying error, beneath the error message, you will view an OK or RESET button, according to the Netflix version. In case you have a RESET button, select it, and the issue can be fixed. In case you have an OK button, pursue the following instructions to reset the application.
  2. After that, hold the Home button over the remote control.
  3. You should reach the Settings option and click on it.
  4. Go to the Apps option and then choose System Apps.
  5. Once you do that, click on the NETFLIX option and hold the ‘Force stop NETFLIX’ option.
  6. Afterward, remove the data and cache of the applications by choosing the ‘Clear cache’ and ‘Clear data’ options.
  7. Now, you should power reset the TV.
  8. Once rebooted the TV, reach the ‘Google Play Store’ app and update the Netflix application.
  9. After completing the update process, sign in to Netflix with the details, and then the application should work correctly.

Netflix Error Feature not Available

If the Netflix error feature is not available, then you can pursue the whole procedure mentioned below:

  1. Navigate to the Home button over the remote control and press it.
  2. After that, reach the Settings option and select it.
  3. You should choose the System Settings option.
  4. Then tap the ‘Set-up’ option and later select Network.
  5. Later, go to the ‘Refresh Internet Content’ option to select it.
  6. Now, once the power cycle process is finished, the application should begin working correctly.

Reinstall the Netflix Application

To reinstall the application, reach the apps field on the Sony smart TV, find the Netflix application, and press the Uninstall to delete the application from Sony smart TV. After uninstalling, proceed and install the Netflix application again, the error will be solved.

So, apply all these fixes and troubleshoot Netflix not loading on your Sony smart TV.

SOURCE:Fix: Netflix Not Loading on Sony Smart TV

A Guide to Hide, Pin, and Filter Chats in Microsoft Teams

Due to the Coronavirus pandemic situation worldwide, there are many people who are working from home, and because of this, sometimes it becomes quite challenging to collaborate with the teams. Clearly, this is a situation where everyone needs to use some sort of tool through which they can be able to collaborate with their teams. And thankfully, for this purpose, there are many options that you can choose from. In the past year, multiple video conferencing tools have been launched, including Zoom, Google Hangouts, Google Meet, and many others. Among all these tools, Microsoft Teams, launched by Microsoft, has now become quite popular video conferencing software that is used by millions of people all over the world. Microsoft Teams video conferencing software covers a lot of great features that provide you with the best experience.

Along with video calling, one can also use this tool for audio calls, instant messaging, and file sharing. Using Microsoft Teams is pretty easy and straightforward. The software even allows you to hide, pin and filter your chats. Do you know how to do so? Are you also one of the users of Microsoft Teams? Well, if you are its new user, then you might not know how to hide, pin and filter your chats within the software. And if you want to know the technique for this, you must go through this entire post.

Techniques to Hide, Pin, and Filter Chats in Microsoft Teams

Microsoft Teams is a powerful platform that you can use for real-time chat and messaging. And if you use this app more often, then there are chances that you might lose any of your individual chats, also known as Direct Messages. But there is no need to be worried. You can quickly get control of your chats by hiding, pining, and filtering messages. And this way, you can keep your chats in an organized manner. For this, you will have to follow the proper method that we have mentioned here. The mentioned procedure covers some simple steps that you need to follow. So, without any further discussion, let’s get to the techniques.

Instructions to Hide, Pin, and Filter Chats in Microsoft Teams

Here are the steps that one must follow to hide, pin, and filter any chats in the Microsoft Teams. Please go through the below instructions to get started with the task:

  • To organize your chats in Microsoft Teams, hiding the unimportant ones is the best option. To do so, firstly, you need to launch the Microsoft Teams software on your computer system, and then go to the “Chats” section. Look for the chats that you don’t want to see anymore, and then click on the three-dotted menu icon placed next to it. After clicking on the menu icon, select the option of “Hide” from the context menu. And now, the chat will get removed from the history. And whenever you start to chat with that person again, you will see it again on the list.
  • If you want to access a hidden meeting chat, you will need to go to the meeting on your calendar. And from there, you can access that hidden meeting chat.
  • And after hiding the chats that you don’t want to see anymore, you can then pin any important chat to the top of the chat panel. For this, you need to click the three-dotted icon placed next to the chat and then click the option of “Pin” from the menu. And now, the direct message will be added to a new pinned section that you can find at the top of the chat list.
  • The chats that you have pinned will always appear in the “Pinned” section. And this way, you will be able to find them with much ease. And if there are multiple pinned chats, you can always drag and drop them to change the order within the section. You can’t do so in the main chat list.
  • Now, if you wish to unpin a chat if it’s not a priority anymore, you can do so by clicking the corresponding three-dotted menu icon. And then select the option of “Unpin” from the menu that appears on your screen. The following chat will then get back to the main chat list.
  • And next, if you want to filter any chats, you will need to click on the three horizontal lines that you can find at the top of the chat panel. And once you have clicked on the filter icon, you will see some options appearing on your computer screen. You can filter any chat by specifying the name or chat type. To filter a chat by name, you need to type the name in the “Filter by Name” textbox that you will find at the top of your screen.
  • And now, you will see the chats and the meeting names on the screen that matches your filter criteria.
  • You can also filter the chats by type by clicking on the three-dotted menu icon. Now, choose any of the options, namely, “Unread,” “Meetings,” and “Muted.” Choosing any of the options will bring back all of the chats, including the meeting chats, the chats that you haven’t read, and the muted chats. And once you are done with filtering the chats, go to the “X” button at the top-right corner of your screen and click on it to close the filter option. And that’s it.

So, this is how any Microsoft Teams users can hide, pin and filter chats within the software. If you are also a user of this great video conferencing tool, then try the procedure now. And in case of any issues, please get to our website.

SOURCE:A Guide to Hide, Pin, and Filter Chats in Microsoft Teams

Samsung’s S-Pen vs. Apple’s Pencil: What Should You Buy

we will tell you the difference between S-pen and an Apple pencil. S-pen is slightly thinner and smaller compared to an Apple pencil. There is a lot of differences between these two products, such as design, functionality, and compatibility. Here is the main difference between these two:

Design

The apple pencil looks much better than the S-pen. The design of the Apple pencil is a lot more like a regular pencil, while the S pen looks similar to both pen and pencil. The S-pen looks like a toy, while the Apple pencil has a smoother matte finish, and it looks much better in general.

Functions

The S-pen can perform a lot of things by itself. It can take a quick note by pressing the button on the pen and then double-tap on the screen. The same feature is not available on the iPad, but it is supposed to be launched with iOS 15 updates. S-pen can perform several actions, including navigation. Apple Pencils cannot be used to navigate such as, go to your home screen. Sometimes it feels annoying because you will have to switch between pencil and your fingers back and forth.

You can use and operate the new tab 7 completely with an S-pen. It has some additional features like translation into another language, mark-up tool during screen recording. The iPad Pro with the pencil does not have this feature.

App Ecosystem

The application ecosystem in iOS is more involved for the Apple pencil compared to the S-pen. As a result, it makes the Apple pencil a lot more useful than the S-pen.

Writing

The S-pen is a better tool for making notes and writing in general. The regular note app you get on the iPad is good but not better than Samsung notes. It provides more pen and color options. You will get more color palettes and preset options. As a result, the S-pen is better for taking notes.

You can always download better writing applications on the iPad. After that, you will get more options than the Samsung notes. You will have to pay a couple of extra few dollars.

Drawing

When it comes to creative works, the Apple pencil is the right choice if you are completely into graphics and designing because of the iOS ecosystem. Apple pencil outshines the S-pen in this category. If you are a designer, then you should go for an iPad with an Apple pencil.

Interaction

Apple pencil has a touch-based interaction, while the S-pen has an actual physical button. Both have their pros and cons. Users might accidentally hit the touch sensor while working on an Apple pencil, but it will never happen to the S-pen. The S-pen requires a press of the button. The S-pen has a safer interaction compared to the Apple Pencil.

Compatibility

The Apple Pencil is only compatible with iPads. It is not compatible with iPhones and not even the MacBook Pro. The S-pen is compatible with the Note series, Galaxy tab series, and Galaxy S series.

Extra Money

Apple pencil does not come with the iPad, iPad mini, or iPad Pro. You will have to purchase it for an additional $130. The S-pen comes with the tablet, inside the box. You will not have to pay any extra cost for the S-pen.

Conclusion

These are the main differences between the Apple pencil and Samsung S-pen. S-pen with Galaxy tab is a great value for money. If you are talking about effort, then an Apple pencil will be the best option for you. It mostly depends upon the app which you are using. The selection might change according to the users. You can check the price on the official website. You might get some deals and offers on the product too.

SOURCE: Samsung’s S-Pen vs. Apple’s Pencil: What Should You Buy

Skip to toolbar